Приказивање постова са ознаком walnuts. Прикажи све постове

недеља, 5. фебруар 2012.

KREM SALATA OD PILETINE, ORAHA, CELERA I JABUKE

Krem salate su izuzetno praktična stvar kada se radi o posluženju većeg broja gostiju. Mogu se napraviti unapred tako da ste taj dan slobodni da se malo odmorite i posvetite sebi, izuzetno su izdašne i po mom iskustvu svi ih vole. Ja sam veliki ljubitelj istih i do sada ste mogli kod mene naći recepte za  Krem salatu od piletine, šampinjona i pirinča, Krem salatu od piletine, susama i kikirikija, Rusku salatu, Mimozu, Ivinu salatu, Crvene paprike u čaši, a daće Bog biće ih još.


Interesantno je što mi u Srbiji ovako bogate i kremaste stvari nazibamo salatama, ali šta da se radi. Kako god da se zvale bitno je da su ukusne. Ako do sada niste probali koren celera i jabuku u slanoj varijanti nemojte se plašiti jer oni ovde daju svežinu salati. Jabuka ne može da se prepozna kao sastojak ako ne znate šta je unutra tako da nevernim Tomama ne morate ni reći šta je unutra, da se ne mršte unapred i bez potrebe.


KREM SALATA OD PILETINE, ORAHA, CELERA I JABUKE

500g belog mesa
150g oraha
100g očišćenog celera - krupno rendan
1 kiselija jabuka, oko 250g - krupno rendana
3 tvrdo kuvana jaja - kockice
300ml majoneza
oko 360ml kisele pavlake 20%mm
1-2 kašičica limunovog soka
svež peršunov list
so

Skuvati belo meso. Iseći ga popreko na 2-3 dela pa ga kad se ohladi  usitniti da bude končast ili kako god volite. Orahe ako želite možete tostirati, tj. staviti u tiganj i malo ih prepeći. Ohlađene orahe staviti u plastičnu kesu pa oklagijom nekoliko puta u nekoliko pravaca preći preko njih da se malo usitne, ali ne previše. Sve sastojke spojiti. Ostaviti da se salata dobro ohladi pre serviranja. Ukrasiti polutkama oraha. Piletina upija dosta soli pa pre serviranja i sipanja u činije proverite da li je dovoljno slano, pa doterajte ukus (so i limunov sok).


CREAMY CHICKEN, CELERY, GREEN APPLE AND WALNUT SALAD

I adore creamy and rich salads, as we call them here in Serbia. Russian salad can be found in every household on New Years Eve, but these kinds of salads are often prepared when large gatherings are in question. They can be served in puff pastry shells or with bread and crackers. They make a great sandwich spread. Here are some more salads from my blog that we enjoy here in Serbia. 

500g chicken breast
150g toasted walnuts
100g peeled celery root - grated
1 green apple, around 250g - grated 
3 hard boiled eggs cubed
300ml mayonnaise
around 360ml sour cream 20% fat
1-2 teaspoons of lemon juice
fresh parsley leaves
salt


Boil the chicken breast. Let cool, and then shred into smaller pieces. Toast the walnuts in a pan if you like. Place the walnuts in a plastic bag and run over them with a rolling pin or just chop them up. Combine all of the ingredients. Place in the fridge to cool. Add more salt and lemon juice before serving since chicken will absorb a lot of the salt. 

четвртак, 19. јануар 2012.

HRSKAVI ZALOGAJČIĆI SA FETOM I RUZMARINOM

Ovi hrskavii zalogajčići sa fetom i ruzmarinom su jedno izuzetno ukusno i vizuelno efektno predjelo, što bi se reklo koktel pecivo. Recept je iz časopisa Sale and Pepe, u originalnom nazivu - Hrskavi zalogajčići s kozjim sirom. Napravila sam nekoliko sitnih izmena u receptu - napisan je u duploj dozi jer su tako dobre, koziji sir sam zamenila fetom zbog cene i pristupačnosti, izostavila sam premazivanje žumancetom jer volim da izgledaju rustično, a dekoracija je moj dodatak. Pravila sa ih nekoliko puta i svaki pit me iznova oduševe.


Ako želite hrskave zalogajčiće onda ih napravite neposredno pre služenja. Stajanjem u frižideru oni postaju mekši, ukusi se stapaju. Za party ih slobodno možete napraviti i dva dana unapred, čak i u mini varijanti.


HRSKAVI ZALOGAJČIĆI SA FETOM I RUZMARINOM
13 keksića promera 6cm

200g belog brašna
100g belog kukuruznog brašna (ne palente)*
80g mlevenih oraha
4 ravne kašičice sitno seckanog suvog ruzmarina
pola ravne kašičice soli
mleveni crni biber
160g listića hladnog putera
oko 80-100ml ledene vode
13 polutki oraha (zavisi od broja poklopaca)
200g fete
za dekoraciju kockice šunke, biber, kačkavalj...


Pomešati belo i kukuruzno brašno, mlevene orahe, ruzmarin, so i biber. Dodati listiće hladnog putera i utrljati ga u brašno da dobijete mrvičastu masu. Radite brzo jer puter ne treba da se zagreva od topline ruku. Dodati u par navrata ukupno oko 100ml ledene vode i brzo povezati testo u kuglu. Ako vam ostanu vidljivi komadići putera to je sasvim ok.  Prebacite kuglu u kesu, pa je staviti u frižider na 30 minuta.

Testo oklagijom rastanjiti na papiru za pečenje na debljinu od oko 5mm. Nemojte stavljati papir preko tasta kad tanjite jer se oklagija ne lepi za njega. Modlom ili čašom vaditi krugove 5-6cm u prečniku. Restlove spojiti pa ponovo rastanjiti i vaditi krugove dok ne potrošite sve. Krugove ređati jedan do drugog, pošto skoro da ne narastaju, u pleh od rerne obložen papirom za pečenje. Ja sam dobila 26 krugova i to je količina za jedan pleh od rerne. Na sredinu  kruga pritisnuti polutku oraha onako da se lepo utisne da ne može da mrda jer će  kasnije nakon pečenja otpasti ako ne pritisnete, i to samo na polovinu krugova, tj. na poklopce. Diskove koji nemaju polutke viljuškom izbockati na 2-3 mesta pošto oni imaju tendenciju da nadođu, a to nam ne treba. Peći 25-30 minuta na 180 stepeni dok se malo ne zarumene. Ostaviti ih da se ohlade.

Fetu umutiti mikserom u kremastu masu pa je ostaviti malo na sobnoj temperaturi da bi bila maziva. Filovati sendviče od keksa sirom. Obod valjati u dekoraciju po želji. Ako volite, pre pečenja i stavljanja polutki oraha, poklopce možete premazati žumancetom koje ste umutili sa malo hladne vode, da bi  bili sjajni i orah bolje držao.

* belo kukuruzno brašno - U receptu sam namerno navela da se palenta ne koristi jer ima zabune oko belog kukuruznog brašna i palente - to nije isto. Međutim, ukoliko vam belo kukuruzno brašno nije dostupno, ja ne bi koristila palentu već bi celokupnu količonu brašna pre zamenila sa oštrim brašnom. Ako nemate oštro brašno onda bi pre koristila 300g mekog nego palentu. Ko zna možda i ona može da se samelje, ali je žute boje pa bi promenila izgled. Kad probam javiću vam.


CRISPY SAVORY BITES WITH ROSEMARY AND FETA

This recipe is adapted from the Serbian edition of Sale and peppe, an Italian food magazine. I made a few adjustments, but the base of the recipe is the same. The recipe below doubled since it is a shame to make it in small batches. I omitted the egg yolk glaze since I like the rustic look. The original recipe calls for goat cheese, but I used feta, which is supposed to be made with goat cheese and added a decoration at the and rolling them in ham. You can make them a day ahead and store in the fridge. They are the crispiest on the day you make them, but stored in the fridge they can keep for days and will only get a bit softer. A beautiful party idea for an appetizer.

200g wheat flour
100g white corn flour (not palenta)
80g ground walnuts
4 even teaspoons of finely cut dry rosemary
salt and pepper
160g cold butter
100ml ice cold water 
80g walnut halves
200g feta
cubed ham, grated cheese, pepper for decoration

Mix the wheat and white corn flour, ground walnuts, add salt, pepper and rosemary. Add in small butter chunks and pulse in the food processor or mix by hand to get a crumbly mass. Add in around 100ml of ice cold water and knead to get a ball of dough. Place the ball in the plastic bag and in the fridge to rest for 30 minutes.

Roll out the dough between two pieces of baking paper to a 5mm thickness. Cut out circles with a cookie cutter or a glass around 5cm in diameter and place them in the oven pan lined with the baking paper. What is left of the dough just bring together and roll out again, cutting out the circles until you use up all of the dough. Place walnut halves in the center of half of the savory cookies and press lightly. Bake at 180 degrees Celsius (no fan) for around 25-30 minutes. Let cool.

Whisk feta with the electric mixer or with a fork into a creamy consistency. Make sandwiches placing the savory cookie with a walnut half on top. If you like roll the sides in cubed ham, finely grated cheese, black pepper....


понедељак, 12. децембар 2011.

ROZEN TORTA (sa domaćim korama)


ROZEN TORTA


KORE

• 5 žumanaca, klasa S (65–70 g)
• 200 g kristal-šećera
• 20 g vanil šećera (2 kesice)
• oko 700 g mekog belog brašna (T-400), po potrebi
• soda bikarbona – na vrh noža
• 160 g putera, sobne temperature
• 200 ml mleka


U velikoj posudi kratko umutiti žumanca sa kristal-šećerom i vanil šećerom. Dodati puter i mutiti samo dok se sastojci ne sjedine. Zatim dodati oko 500 g brašna, sodu bikarbonu i mleko, pa ručno povezati masu.

Testo je u ovoj fazi lepljivo. Dodati još oko 100 g brašna i lagano ga dlanovima pripajati testu, uz nežno preklapanje. Testo se ne mesi kao hleb i ne zahteva snažno gnječenje. Cilj je da se dobije mekano, blago lepljivo testo koje se odvaja od ivica posude i formira jedinstvenu masu. Previše brašna daje tvrde i žilave kore.

Testo prebaciti na radnu površinu i postepeno dodavati još oko 100 g brašna. Testo treba da bude mekano, blago lepljivo, ali kompaktno. Iako može primiti i znatno više brašna, preporuka je da se zaustavite oko 700 g i procenite da li je potrebno dodati još sasvim malo.

Testo odmah podeliti na 8 jednakih delova, približno 160 g po komadu. Jufke držati na sobnoj temperaturi, na blago pobrašnjenoj podlozi, dok čekaju tanjenje.


RAZVIJANJE I PEĆENJE KORA

Iseći 8 papira za pečenje dimenzija približno 30 × 24 cm. Svaku jufku staviti na papir, blago pritisnuti dlanom da dobije pravougaoni oblik, a zatim razviti oklagijom.

Ako se oklagija lepi za testo, to je dobar znak. Povremeno lagano pobrašnjavati površinu kore i nastaviti sa tanjenjem. Testo treba da bude vrlo tanko, približno 0,5–1 mm. Kako se razvija, prelaziće ivice papira; višak iseći nožem i iskoristiti za popunjavanje delova gde nedostaje testo.

Koru zajedno sa papirom prebaciti na poleđinu pleha. Pre pečenja izbockati viljuškom oko 50 puta. Peći na 160 °C oko 6 minuta, na drugoj rešetki odozdo. Kore treba da ostanu svetle; blago tamnjenje dozvoljeno je samo na ivicama.

Pečene kore slagati jednu na drugu zajedno sa papirom za pečenje i pokriti krpom dok se ne pripremi fil.


FIL

• 300 g mlevenih oraha
• oko 20 kašika vrelog mleka (približno 300 ml, po potrebi)
• 250 g putera, sobne temperature
• 5 belanaca, klasa S
• 250 g šećera u prahu
• 20 g vanilin šećera (2 kesice)


Mlevene orahe postepeno popariti vrelim mlekom, dodajući ga kašiku po kašiku dok se ne dobije gusta, kompaktna masa. Količina mleka zavisi od svežine oraha.

Puter umutiti mikserom, pa dodati u orahe i kratko sjediniti. Posebno umutiti čvrst sneg od belanaca, zatim dodati šećer u prahu i vanilin šećer i još kratko mutiti. Sneg lagano umešati u smesu od oraha i putera, na najmanjoj brzini miksera ili ručno.


SLAGANJE I FAJTANJE KORA

Za fajtanje:
• malo mlakog mleka

Fil podeliti na 7 jednakih delova. Na poslužavnik postaviti prvu koru tako da je ravna strana okrenuta nadole. Koru blago poprskati ili premazati mlakim mlekom, zatim naneti jedan deo fila. Postupak ponavljati dok se ne utroše kore i fil. Poslednju, najlepšu koru postaviti ravnom stranom nagore.

Tortu prekriti papirom za pečenje, zatim staviti tacnu i opteretiti sa 2–3 litra mleka ili sličnim teretom. Držati u frižideru oko 12 sati da se torta izravna.

ROZEN GLAZURA


• 500 g šećera u prahu
• 2 belanca, sobne temperature
• 8 kašičica suncokretovog ulja
• 1–3 kapi crvene tečne prehrambene boje
• oko 5 kašičica limunovog soka

Belanca mutiti mikserom oko 1 minut, dok se ne zapene. Odvojiti jednu do dve kašike umućenih belanaca sa strane. U preostalu masu dodati polovinu šećera u prahu, sav limunov sok, ulje i prehrambenu boju, pa mutiti dok se ne ujednači.

Dodati ostatak šećera u prahu i po potrebi umešati sačuvani deo belanaca dok se ne dobije gusta, sjajna glazura koja se lagano razliva. Ako je glazura pregusta, dodati kašičicu do dve vrele vode.

Tortu izvaditi iz frižidera i ostaviti oko 3 sata na sobnoj temperaturi. Glazuru naneti širokim, glatkim nožem zagrejanim pod mlazom vrele vode. Površinu poravnati sigurnim potezima. Po potrebi, neravnine se mogu izravnati toplim vazduhom iz fena.

Tortu vratiti u frižider. Kada se glazura stegne, odseći neravne ivice i degustirati ih. :)

Torta je najbolja sutradan, ali ostaje odlična i nakon više dana u frižideru. Pogodna je i za zamrzavanje.


ROSEN TORTE


LAYERS

• 5 egg yolks
• 200 g granulated sugar
• 20 g vanilla sugar
• about 700 g all-purpose flour
• a pinch of baking soda
• 160 g butter, at room temperature
• 200 ml milk

Whisk the egg yolks, granulated sugar, and vanilla sugar with a mixer for one to two minutes. Add the butter and whisk just until incorporated. Add 500 g of flour, the baking soda, and the milk, and mix briefly, just until the dough comes together.

Set the mixer aside and continue working the dough by hand, adding about 100 g of flour. The dough will be sticky at this stage. It should be handled gently and not kneaded like bread dough. The goal is simply to bring it together into a soft mass.

Transfer the dough to a work surface and gradually sprinkle it with the remaining flour (about 100 g or less). Gently press the flour into the surface of the dough with the palms of your hands, folding it over itself. The dough should remain soft and slightly sticky, but compact. Adding too much flour will result in hard, dry layers.

Divide the dough into 8 equal pieces, each weighing about 160 g. Shaping the dough into a log and cutting it into discs makes this easier.

Cut out 8 sheets of baking paper measuring 24 × 30 cm. Roll out each piece of dough directly on the paper until it covers the entire surface. The dough should remain slightly sticky.

Place one disc of dough onto the baking paper and press it gently with your hands to form a small rectangle. Begin rolling it out with a rolling pin. If the rolling pin does not stick at all, too much flour has been added, but continue rolling. The baked layers will need extra time to soften once assembled, which is still acceptable.

If the dough is sticky, you are on the right track. Lightly dust the surface as needed while rolling. The dough is buttery and may extend beyond the edges of the paper. Trim any excess and transfer it to areas where the dough is thinner. Continue rolling and patching until the paper is fully covered.

Transfer the rolled layer, together with the paper, onto an upside-down baking tray.

Prick the surface of the layer about 50 times with a fork to prevent air bubbles during baking. Place the tray in the oven on a rack below the center.

Bake at 160 °C (no fan) for 6 minutes. If using two baking trays, rotate them so one is always cool. If placing dough onto a hot tray, the baking time will be slightly shorter (about 5 minutes), so close attention is required.

Stack the baked layers with the baking paper still attached, cover them with a clean kitchen towel, and let them rest while preparing the filling.


CREAMY WALNUT FILLING

• 300 g ground walnuts
• about 20 tablespoons hot milk
• 250 g butter, at room temperature
• 5 egg whites
• 250 g icing sugar
• 20 g vanilla sugar

Pour the hot milk over the ground walnuts, adding it gradually until a thick, creamy paste forms. The exact amount depends on the moisture content of the walnuts.

Whisk the butter for about one minute, then add it to the walnut mixture and mix until smooth. In a separate bowl, beat the egg whites to stiff peaks, gradually adding the icing sugar and vanilla sugar.

Gently fold the egg whites into the walnut mixture by hand until evenly incorporated.


ASSEMBLY AND SOFTENING OF THE LAYERS

• a small amount of warm milk

Divide the walnut filling into 7 equal portions. Place the first baked layer onto a large serving tray. Lightly sprinkle it with warm milk two or three times using your fingers or a spoon. Do not overdo it, as excess milk will make the layers soggy.

Spread one portion of the filling evenly over the layer. Place the next layer on top, sprinkle lightly with milk, and cover with filling. Repeat until all layers and filling are used. Finish with the final layer, placing it smooth side up.

Cover the torte with baking paper, place another tray on top, and weigh it down evenly with a moderate weight. Refrigerate for about 12 hours to allow the layers to soften and level.


PINK SUGAR ICING

• 500 g icing sugar
• 2 egg whites, at room temperature
• 8 teaspoons sunflower oil
• 1–3 drops red food coloring
• about 5 teaspoons lemon juice

Remove the torte from the refrigerator about 3 hours before glazing. Beat the egg whites until stiff peaks form. Set aside 2–3 tablespoons of the beaten whites.

Add half of the icing sugar, all of the lemon juice, the sunflower oil, and the food coloring, and whisk until smooth. Gradually add the remaining icing sugar, whisking until a thick, glossy icing forms. If the icing is too thick, add some of the reserved egg whites.

Using a wide, smooth knife warmed under hot running water, spread the icing evenly over the surface. It is better to have extra icing than not enough.

Return the torte to the refrigerator for a few hours until the icing sets. Trim the uneven edges, then cut the torte into rectangular slices.

четвртак, 1. децембар 2011.

BAJADERA (bez keksa)

Pre nekoliko godina ova predivna bajadera se pojavila na repertoaru teta Milene, kao sitni posni slavski kolač, ali u obliku kockica. Te godine ove bajadere nisu dočekale da ih gosti probaju, jer smo ih mi deca, pojeli pre njih. Kako je ko ulazio i izlazio iz ostave (slučajno ili namerno) gde uredno stoje poslagane tacne i tacne sa sitnim kolačima, tako su bajadere misteriozno nestajale.

Ovo nije klasična bajadera, jer u ovom receptu nema keksa, a tri sloja se prave na bazi oraha, badema i pečenog lešnika. Možete je praviti kao mrsnu, sa puterom ili sa margarinom u posnoj verziji.


Recept nije komplikovan, a ako unapred sameljete badem, orah i lešnik. Pravi se izuzetno lako, ali je potrebno da ste stalno tuda bi procenili kada je najpogodniji trenutak da se smesa koja se hladi razlije. Osim prvog sloja koji je nešto gušći, sloj sa bademom i lešnikom je ređi kad se pripremi, pa je potrebno nadgledati smesu dok se hladi i preliti tek kada je mazive gustine, a onda sve staviti u frižider i tek kad se ohladi krenuti sa pravljenjem sledećeg sloja.

Recept za glazuru sam pozajmila od Dadeta, tj. Bajadere sa bloga Cooks and Bakes, samo što sam količinu proporcionalno smanjila. Bajadera prelivena ovom čokoladnom glazurom, koja se pokazala kao odlična, ide na hlađenje u frižider i može se seči čim se stegne malo. Nisam imala nikakav problem sa pucanjem,  što vidite i na datom uzorku.


BAJADERA BEZ KEKSA

PRVI SLOJ - ČOKOLADA I ORASI
80g kristal šećera
3 kašike vode
83g putera
100g čokolade za kuvanje, Menaž
100g mlevenih oraha

DRUGI SLOJ -  BADEM
80g kristal šećera
3 kašike vode
83g putera
100g sirovog blanširanog badema, mlevenog

TREĆI SLOJ - LEŠNIK
80g kristal šećera
3 kašike vode
83g putera
100g pečenog mlevenog lešnika

ČOKOLADNA GLAZURA
100g čokolade za kuvanje
50g putera
1 prepuna kašika kristal šećera
1 kašika vode i još trećina kašike


Prvo napraviti šećerni sirup. U manju šerpicu sipati  kristal šećer i vodu, i uključiti ringlu na 5-i podeok (od 6), pa kad se prvi mehurić pojavi kuvati oko 3-4 minuta. Dok je šerpica na ringli ubaciti puter i rastopiti ga. Skloniti šerpicu sa ringle i ubaciti čokoladu. Mešati dok se ne otopi. Ubaciti mlevene orahe i mešati dok se ne povežu. Na papiru za pečenje kad se masa malo ohladi, nakon 10-ak minuta namazati masu u oblik pravougaonika, otprilike 17x24cm. Izravnati širokim nenareckanim nožem masu i kako se masa hladi lepo je oblikovati u pravougaonik. Ostaviti da se malo ohladi, prebaciti je sa papirom na tacnu, pa staviti tacnu u frižider da se stegne, negde oko pola sata ili duže. Kada je izvadite iz frižidera pred mazanje sledećeg sloja možete je poravnati nožem koji ste provukli kroz vrelu vodu i još malo doterati ivice. Tako možete uraditi i sa sledećim slojevima, tj. lepo ih izravnati nakon hlađenja pre svakog novog sloja.

Ponovo napraviti šećerni sirup, ali ovoga puta umešeti samo puter da se rastopi. Skloniti sa vatre pa dodati mleveni badem. Ova masa je izuzetno žitka i neka vas to ne brine. Ostaviti je da se ohladi. Ja sam moju stavila na prozor. Nadgledajte masu i povremeno promešajte jer ne želimo da se isuviše stegne, jer onda smo sve upropastili. Kada je masa maziva, otprilike nešto ređa od npr. paštete ili Eurokrema ili Nutele sobne temperature, sipati je preko prvog sloja i lagano nožem premazati da odgovara veličini prvog sloja. Ako malo curi sa strane, ali samo malo, onda je lepo vraćajte nožem. Ako procenite da masa juri po prvoj kori, da je preretka, znači da se nije dovoljno ohladila, onda malo saćekajte. Kada je namažete stavite tacnu u frižider da se stegne negde oko pola sata ili duže. Tek kad se stegne, tj. kada vam se prst sasvim malo lepi kada je pipnete, počnite da pravite treći fil. Nakon hlađenja pre nanošenja trećeg sloja možete nožem malo doterati ivice, tj.izravnati.

Za treći sloj ukuvati šećerni sirup, dodati puter da se otopi. Skloniti sa ringle, pa dodati  lešnik. Žitku masu ostaviti da se ohladi, pa kad bude maziva sipati je preko drugog fila. Staviti bajaderu frižider na nekoliko sati ili preko noći.

Pre pravljenja čokoladne glazure izvaditi bajaderu iz frižidera, da nije baš ledena kada nanosite glazuru jer se onda brzo steže. Na pari otopiti sve sastojke za glazuru uz neprestano mešanje. Preliti preko bajadere i lagano razmazati širokim i dugačkim nožem. Staviti je u frižider da se stegne. Možete seći nakon pola sata hlađenja ili nakon nekoliko sati jer se sjajno seče. Visina bajadere je 2.5cm. Možete je seći i na kockice.


SAVETI
Ako ste kupili sirove bademe u ljusci, ubacte ih u ključalu vodu na kratko, tj. blanširajte,  izvadite i skidnite im  opnu. Badem treba sam da iskoči iz opne kada se pritisne. Bademe  dobro osušite u krpi, pa ih ostavite da se osuše preko noći na sobnoj temperaturi. Badem treba da je što belji.

Lešnik kupujem nepečen i njega stavljam u limeni pleh, pa tek onda uključim rernu na 170 i pečem dok ne počne blago da miriše iz rerne, i dok ljuspice ne postanu crne. Vrele lešnike stavim u komad tkanine, zatvorim pri vrhu i trljam jedne od druge da se ljuspice skinu, a tkaninu posle bacim. Lešnik tek kada je lepo ispečen  daje svoju punu aromu. Ako ste kupili pečen lešnik i njega dopecite u rerni.

Uvek kupite više oraha, badem i lešnika nego što je u receptu naznačeno, negde oko 130-150g jer će vam deo otići prilikom pečenja lešnika, deo otpasti na ljuspice od badema, a deo će sigurno zaostati u mašini za mlevenje. Merite mlevene sastojke, a ne nemlevene.


BAJADERA

FIRST LAYER - CHOCOLATE AND WALNUTS
80g crystal sugar
3 tablespons of water
83g butter
100g dark chocolate
100g ground walnuts


SECOND LAYER - ALMONDS
80g crystal sugar
3 tablespons of water
83g butter
100g ground blanched almonds


THIRD LAYER - HAZELNUTS
80g crystal sugar
3 tablespons of water
83g butter
100g ground hazelnuts (pretoasted)


CHOCOLATE LAYER
100g dark chocolate
50g butter
1 full tablespoon of crystal sugar
1 tablespoon of water and a third tablespoon


First make sugar syrup. In a small pot place sugar and water and let boil. When the first bubble appears boil for additional 3-4 minutes. While still on the stove drop in the butter and stir for it to melt. Take of the stove and add in the chocolate. Stir until it melts completely. Add in the walnuts and stir into a uniform mass. Let it cool for 10 or so minutes and then pour onto the baking paper. Spread with a knife into a rectangle shape 17 x 24cm. Place the paper when it cools a bit on a large tray and transfer to the fridge to cool completely, around 30 or so minutes. 

To make the almond layer make the sugar syrup like I described in the previous paragraph. Place the butter in and let it melt. Take of the stove and add in the hazelnuts. Stir. You will get a dense mixture. Let it cool at room temperature or place outside if it is cold. Check and stir from time to time. We want it to cool but not too much so we would not be able to spread it. It should be like cream cheese at room temperature. Pour it over the walnut layer and even out with a knife. Let cool a bit and again place in the fridge to cool completely for 30 or so minutes. Your finger should not stick to the layer when you touch it.

For the hazelnut layer make the sugar syrup again. Drop in the butter and let it melt. Take of the stove and add in the hazelnuts. Let it cool like described above, and pour over the almond layer when it is still creamy and able to spread. let cool in the fridge completely or over night.

Before pouring the chocolate over take out the bajadera out of the fridge because if you pour it over the cold bajadera the chocolate will set very quickly. Let it stand at room temperature for an hour or so. Melt the chocolate, water, butter and sugar in the double boiler. Pour over the bajadera and spread with a knife. let cool in the fridge completely before cutting. 


среда, 28. септембар 2011.

LJUBAVNA AFERA SA STARINSKIM KOLAČIMA - ČUPAVA RADA

Čupava Rada ili čupava Kata, kako vam je milije, je kolač iz sveske moje mame. Ne znam tačno od kada datira ovaj recept, ali po strukturi i sastojcima se može svrstati u stare recepte. Sipkavo testo sa puterom koje se delom razvlači kao podloga, a delom zamrzne, pa izrenda da kolač dobije svoj čupav izgled. Bogat filom koji čini šne od belanca u koje se dodaju krupno seckani orasi, suvo grožđe i džem od kajsija. 


Na prvi pogled prilično neugledan kolač, ali svojim ukusom osvaja. Sipkavo testo koje se topi u ustima i fil koji se inkorporirao u testo taman toliko da mu da potrebnu vlažnost, slatkoću i posebnost. Listala sam brojne recepte na netu da vidim kako se pravi u drugim kućama i nisam naišla na recept u kome se dodaju seckani orasi, mahom su mleveni, i suvo grožđe. Tokom pečenja grožđe nabubri u šamu, upije tečnost i da neverovatnu sočnost celoj stvari. Džem od kajsije daje potrebnu kiselost u prilično slatkom filu. Taj sladak fil takođe balansira testo koje nema mnogo šećera. Moj dodatak celom receptu koji nisam menjala je rendana korica limuna u testu i tu nisam pogrešila.


Ovo je kolač koji se čuva van frižidera i koji svakim danom postaje sve bolji. Po meni bi to bila i definicija starinskih kolača, jednostavno oni postaju lepši stajanjem na sobnoj temperaturi, tj. nemaju ograničeni rok trajanja. 

Maja je skoro pravila Čupavu pitu od šljiva koja je za mene nešto sasvim novo i vredno je isprobavanja. Kako kažu, svaka kuća svoj recept ima za klasike, a ja tako volim da zavirim u vaše kuhinje i vidim po čemu se neki klasični recepti razlikuju. Uvek pronađem neku novu caku.

Još jedna stvar, nemojte kupovati suvo grožđe na meru za ovaj kolač. To grožđe je prilično isušeno, već kupite u kesicama. Ušteda nije velika, a ovo iz prodavnice je mnogo sočnije i bolje u ovom kolaču.


unutrašnje dimenzije dna pleha 37cm x 20cm

TESTO
250g hladnog putera
5 žumanca
4 kašika kristal šećera
500g brašna
12g praška za pecivo
rendana kora jednog limuna
3-4 kašika hladne vode

FIL
5 belanca (velika jaja)
250g kristal šećera
100g grubo seckanih oraha
100g belog suvog grožđa
300g džema od kajsija


U veću šerpu sipati sve sastojke za testo osim vode, pa sve sjediniti utrljavanjem putera u brašno. Ovaj proces treba da traje što kraće da se testo ne greje previše rukama, a ako vam ostanu grudvice putera to je sasvim ok. Ako je potrebno, dodajte par kašika hladne vode da se masa poveže u kuglu. Jednu trećinu testa pritisnuti u oblik pravougaonika pa ga staviti u kesicu i u zamrzivač dok ostalo ne završite, a dve trećine testa u kesi stavite u frižider dok ne završite fil, na nekih pola sata. 

Za fil, mikserom umutiti belanca u šam. Pred kraj postepeno dodati kristal šećer i mutiti dok se ne dobije čvrst šam nekih desetak minuta. Ručno umešati orahe, suvo grožđe i džem, pa lagano prebacivati da šam ne splasne mnogo. Naputerisati ivice pleha. Iskrojiti papir veličine dna pleha, 37x20cm, pa na njemu rastanjiti testo iz frižidera, one dve trećine testa. Tanjiti preko još jednog komada papira za pečenje da se oklagija ne lepi za testo. Gornji papir skinuti, pa sa donjim papirom prebaciti u pleh. Šam sipati preko testa koje ste malo izbockali viljuškom, pa preko šama narendati na krupno testo iz zamrzivača - jednu trećinu testa.

Peći na 190 stepeni oko 35 minuta ispod polovine rene, a onda pokriti pleh sa papirom za pečenje i peći još 10 minuta. Ako testo počne da gori pokriti pleh alu folijom, a ako se ispeče bolje na jednom kraju rerne a na drugom ne onda obrnuti pleh  toku pečenja. Seći na kocke kada se kolač ohladi i čuvati ispod zvona na sobnoj temperaturi.


MESSY RADA'S HAIR

DOUGH
250g thin slices of cold butter
5 egg yolks
4 tablespoons of crystal sugar
500g flour
12g baking powder
zest of one lemon
3-4 tablespoons of cold water


FILLING
5 egg whites
250g crystal sugar
100g roughly chopped walnuts
100g raisins
300g apricot jam


Place all of the ingredients for the dough, except the water, in a large pot and knead just enough to incorporate and make a ball of dough. Ad water if needed. Do this as quickly as possible since we do not want the dough to warm up from your hands. Divide the dough into one third and two thirds. Place one third of the dough that you have flattened a bit in a plastic freezer bag and then place in the freezer for 30 minutes. Place the rest of the dough in a bag and put in your fridge for half an hour.


For the filling beat the egg whites with an electric mixer stiff. Near the end gradually add in the crystal sugar and beat until stiff peaks form. The process should take up to 10 minutes. By hand, add in the raisins, chopped walnuts and jam and carefully flip it in so the egg white does not loose much of its firmness.


Take the two thirds of the dough out of the fridge and roll out on a piece of paper that you have cut out to fit the bottom of your pan. My pan was 37x20cm, the inside measurements. Roll the dough with the rolling pin over another baking paper. Prick the dough that is rolled out with a fork and place at the bottom of your pan. Butter up the sides of your pan. Place the filling in. Even out with the back of the spoon. Take the one third of the dough that is in the freezer and shred on a shredded over the filling.

Bake at 190 degrees Celsius (no fan) for 35 minutes and then cover with aluminum foil and bake for additional 10 minutes. Let cool at room temperature and then cut into squares. Keep in room temperature and enjoy for days to come.


This is a dessert that I remember from my childhood. It is a sort of pie crust dessert with a beautiful filling made of egg whites, apricot jam, chopped walnuts and raisins that when baked dissolves into the crust giving it the moisture it needs. Rada's messy hair, well the name comes from the look of the dessert, it is messy. The dough is divided into two parts, one part is placed in the fridge and is used for the bottom crust, and the other part is placed in the freezer and shredded almost frozen so you can get the distinct top crust. This dessert falls into the category of old fashioned desserts that get better as days pass. It is kept in the room temperature. No need for the fridge for these scrumptious sweet squares.


уторак, 16. август 2011.

NIRVANA SLADOLED

Prvo pogledajte reklamu za Nirvana sladoled, pa onda idemo dalje.


Nirvana, karamel sladoled sa karamel prelivom i karamelizovanim pekan orasima kompanije Nestle, je jedini industrijski sladoled koji se meni dopada i koji na žalost ima, shodno svom kvalitetu, i divnu visoku cenu. Kada je Dade objavilo post o pravom sladoledu na Majinom blogu koji je nastao dvogodišnjom saradnjom sa Majom, njihovim eksperimentisanjem, prepiskom na sajtu BeCook, dodavanjem i oduzimanjem, poneseni entuzijazmom pronalaska formule za savršen sladoled u kućnoj izradi, znala sam da je to prava stvar-osnova za moju Nirvanu. 


Ceo proces izgleda komplikovano, ali zaista nije. Prvi put zapišite sebi sve, a sledeći put ćete raditi bez gledanja u papir, očas posla, i to garantujem da ćete novu turu praviti čim prva bude pred kraj.


Od ove količine se dobije preko 900g sladoleda. Nemojte da vas zavaravaju pakovanja industrijskih sladoleda. Iako je kutija od litar, u nju stane nekad i tričavih 500g sladoleda, jer su industrijski sladoledi naduvani, puni vazduha, pa gramaža ni približno ne odgovara volumenu. Jedino što ovaj sladoled nema su emulgatori, boje, i aditivi, a sve ostalo je tu.


I DAN

MAŠINA ZA SLADOLED U KUĆNOJ IZRADI...3 minuta posla
2.5 litara hladne vode
250g soli
šerpa od 5 litara

U šerpi zapremine oko 5 litara (prečnika 25cm) sipati vodu i so, pa mešati dok se sva so ne rastvori.
Šerpu staviti u zamrzivač.

KARAMELIZOVANO KONDENZOVANO MLEKO...nekoliko minuta posla...2 sata kuvanja 
50g kristal šećera
1 litar mleka 3.2 ili 3.8%mm
šerpa od 2.5-2.8 litara (sutradan treba da stane u ovu sa ledom a da ima mesta okolo za led)

U šerpi zapremine manje od 3 litre sipati šećer i uključiti šporet na srednju vatru. Ne mešati, već čekati da se šećer sam od sebe karamelizuje. Kada je svetlo žute boje, ne želimo da potamni mnogo, naliti sa 1 litar mleka, varjačom malo odići šećer od dna i ostaviti na tihoj vatri, 2-3 podeok od 6, da se kuva, nepoklopljeno. Meni je proces trajao 160minuta, a kada sam pojačavala vatru u drugoj turi pravljenja trajao je 120 minuta. Mleko ne kipi, niti zagoreva. Dade kaže da može i na jačoj vatri, za nekih pola sata, ali verovatno tom mleku treba nadzor. Meni je ovako lakše. 

Kako da znam da je ostalo 500ml kondenzovanog mleka?

Povremeno, dok kuvate, vrelo mleko sipajte u plastičnu mericu od litar da vidite koliko mleka je ostalo ili ako nemate mericu onda pre kuvanja na vagi stavite drvenu dasku i šerpu u kojoj je mleko, izmerite i zapišite, pa takom kuvanja merite mleko sa sve šerpom na dasci čekajući da se težina smanji za 500g. Ne skidajte kajmak sa mleka! Na kraju odvaditi 6-7 kašika kuvanog kondenzovanog mleka i dodati je smesi koja je dole navedena.

DODATAK KONDENZOVANOM MLEKU.........nekoliko minuta posla
5 žumanaca
50g kristal šećera
2 vanil šećera (ne mora)
6-7 kašika odvađenih od kondenzovanog mleka

Viljuškom kratko umutiti gore navedene sastojke pa ih sipati u mleko koje je počelo da vri. Mešati varjačom sa ravnom ivicom. Kada počne ponovo da vri treba vam oko minut da postignete željenu konzistenciju gušćeg jogurta. Ostaviti da se ohladi tako u šerpi, pa onda staviti u frižider do sutra. Ako smesa ima grumuljice koje su porekla neodvađenog kajmaka (ne skidajte kajmak), ne brinite. Sve će to sutra lepo izgledati kada se umuti mikserom.

KARAMEL PRELIV.........oko 10 minuta
250g kristal šećera
50g putera
250ml slatke pavlake Imlek 36%mm

Prvo zagrejati slatku pavlaku u šerpici onako da skoro provri, pa je staviti sa strane.U dubljoj šerpi sa teškim dnom ili običnoj, sipati šećer i uključiti ringlu na srednju vatru, recimo 4 od 6 podeoka. Ne dirati i ne mešati, i ostaviti da šećer sam počne da karamelizuje. Povremeno možete malo okrenuti šerpu levo-desno. Karamelizovani deo će početi da probija kroz nekaramelizovani, a tada možete uzeti šerpu za dršku i vrteti je malo iznad plotne, odignutu. Kada je šećer skoro karamelizovan, maknuti sa vatre, smanjiti na 2 podeok, dodati puter, i pomešati dok se on ne istopi. Puter i šećer se neće u potpunosti sjediniti. Doliti prethodno zagrejanu slatku pavlaku, ali manju količinu. Promešati, pa doliti ostatak. Vratiti na ringlu. Mešati, naravno varjačom, par minut da se sve ujednači na 2. podeoku. Smesa će biti razjedinjena sa većim nakupinama karamela i tečnim delom, ali ćese vremenom sve sjediniti i ujednačiti. Kada je skoro da se ujednači, pojačati na 5.podeok i uz stalno mešanje kuvati još oko minut da se malo zgusne. Ostaviti da se malo ohladi, pa sipati u teglicu. Pre prelivanja sladoleda stavite teglicu u vrelu vodu da karamel postane ređi jer nam za ovaj sladoled treba na sobnoj temperaturi. Čuvati ostatak u frižideru, ili ga zamrznite. U zamrzivaču se neće u potpunosti zamrznuti, tako da je spreman za upotrebu jako brzo.

Ja sam potrošila trećinu karamel preliva za ovaj sladoled, a od ovog recepta se dobije oko 350g. 


II DAN

UŠEĆERENI ORASI.............nekoliko minuta posla
100g krupno seckani oraha
1 puna kašika meda
1 kašika vode
1 kašičica ulja
nekoliko kašika kristal šećera za posipanje

U šerpici sipati med, vodu i ulje, dovesti do vrenja, pa ubaciti orahe i 2-3 minuta dok orasi ne popiju svu tečnost. Ako med počne da gori, tj. da poprima jako tamnu boju, sklonite sa ringle i nastavite sa mešanjem. Tople orahe sipajte u ravan tanjir u kome ste sipali 2 kašike kristal šećera, pospite još malo po njima i mešajte da se orasi lepo oblože, a onda ih tako tople prebacite na ravni tanjir i prstima razdvojite da se suše nekih 30 minuta dok ne napravite sladoled. Recept u duploj dozi možete videti ovde, samo što sam izostavila mrvu soli u ovoj verziji.

HLAĐENJE SLADOLEDA........oko 15 minuta

Izvaditi led iz frižidera, našu mašinu za sladoled u kućnoj izradi. Drškom varjače lupajte po površini dok ne razbijete led u sitne parčiće. Led se brzo pretvara u bljuzgavicu, pravu beogradsku, ali čistu. Sliku postupka vidite kod Maje. Zaronite šerpu sa sladoledom u lonac sa ledom, tako da je led na dnu i oko nje i ostavite nekih 15 do 20 minuta ili mešajte varjačom skidajući sladoled sa dna i ivica, pa će proces trajati kraće.

MUĆENJE SLADOLEDA.............oko 5 minuta

Dok je sladoled još u ledu uključite mikser i mutite ga oko 5 minuta dok se ne duplira u volumenu. Imaće konzistenciju divnog krema.

ZAVRŠNICA.......2 minuta

U gotov sladoled ubacite karamelizovane orahesa kojih ste otresli višak kristal šećera. Promešajte. Dno i ivice posude za sladoled u kome ćete ga zamrznuti premažite Majinim karamelom, sipajte pola sladoleda, pa onda sipajte tečni karamel iz teglice. Ja sam teglicu zronila 5 minuta u vrelu vodu da bi karamel lepše sipala. Ako pravite tanke niti karamela on se neće ni primetiti. Najlepše je kada i veća količina karamela sklizne. Prelijte ostatkom sladoleda i ponovo prošarajte kramelom. Stavite sladoled u zamrzivač. Može se jesti nakon nekoliko sati....ako izdržite da ga ne liznete.

UŽIVANCIJA...NIRVANA....


NIRVANA ICE CREAM - A COPYCAT RECIPE 

This is the recipe for home made ice cream, that came about as a result of a two year long experimenting, by trial and error. I knew right away that this perfection for vanilla base ice cream would be my base for Nirvana ice cream. I do not know if you have Nirvana at your stores, but take a look at the YouTube video at the top of the post and see what I am talking about. A caramel ice cream, with caramelized pecans and caramel in it. Perfection! With the help of Maja and Dade I made this version. You have to understand that condensed milk is hard to come by here in Serbia, so a home made version, where you let the milk boil and reduce to half its volume is a great recipe. The two of them gave us a home made ice cream machine, using basic chemistry that I would not have thought of. For those of you who do not have an ice cream machine, this is a real treat. Well, prepare yourself for a pleasure experience. If it looks too long, this recipe I mean, do not get frightened. You will have to look at the recipe the first time, and already when you are near the end of your first bowl you will be starting a next batch, but you wont have to look at the recipe, because it is so easy.

I DAY

HOME MADE ICE CREAM MACHINE.......3 minutes of work
2,5 liters of water
250g of salt
5 liter cooking pot

In a pot that holds around 5 liters (diameter 25cm) pour the water, add in the salt and stir for a while until the salt dissolves. Place the pot in the freezer overnight.

CARAMELIZED CONDENSED MILK...couple of minutes of work...2 hours of cooking
50g of caster sugar
1 liter of full fat milk 3,2-3,8% fat

In a pot that holds close to 3 liters (diameter of the bottom 17cm since it needs to fit in the large one that is in the freezer) place sugar and turn to medium heat. Wait for the sugar to caramelize, only tilting the pot from side to side. Do not stir. When the sugar is light golden pour in the milk and right away with a wooden spoon lift of the sugar that is stuck to the bottom, reduce the heat to a minimum (2 out of 6 dials) and cook until the milk has dropped to half of its volume. How will you know when it has reached 500ml. Well, from time to time pour in the boiling milk in a measuring cup and see if it has reached 500ml. It took me over 2 hours. You can do it faster with the heat turned up more, but you will need to supervise the pot. This way with the heat on low just check and measure from time to time. Take out 6-7 tablespoons of this caramelized condensed milk for the next step.


If you have condensed milk in your store, buy the unsweetened kind. Caramelize 50g of sugar, pour in 500ml of condensed milk and bring to a simmer just letting the sugar dissolve. This is the faster version. Take out 6-7 tablespoons of this milk. You will need it for the next stage.

ADDITIONAL......couple of minutes of work
5 egg yolks
50g of caster sugar
10g of vanilla sugar
6-7 tablespoons of the caramelized condensed milk


With a fork lightly beat all of the above ingredients and pour them in into the caramelized condensed milk that you have brought to a simmer. Stir constantly, and when it starts to come to a simmer again cook for an additional minute. Take of the stove and let cool at room temperature. Place in the fridge till the next day.

CARAMEL TOPPING...10 minutes of work
250g of caster sugar
50g of butter
250ml heavy whipping cream 36%fat


Here is the original recipe. Place the heavy cream in a pot and heat till it comes to a boiling point. Take of the stove and set aside. Place the sugar in a heavy bottom deep pot or a regular pot, and turn the heat to a medium. Do not stir, just wait for the sugar to caramelize occasionaly tilting the pot from side to side. When the sugar is light golden, take aside and place in the butter. Turn the heat to low. Stir until the butter has dissolved. Pour in a third of the cream that you have previously heated. Pour in the rest of the cream and stir. Place on the stove and keep stirring with a wooden spoon. It will have clumps and will look like it will never come together. It will. When all the clumps have melts and the caramel is uniform, turn up the heat and stir for a minute or two until it thickens. Pour into a jar when it cools a bit. You do not need all of this caramel, app. a third. Just keep it in the fridge or in the freezer. It can keep for a long time.

II DAY

CARAMELIZED WALNUTS...couple of minutes of work
100g of roughly cut walnuts or pecans
1 full tablespoon of honey
1 tablespoon of water
1 teaspoon of oil
couple of tablespoons of caster sugar


I used my recipe, just halved the ingredients and left out the salt. You can see the pictures here. Place the honey, water and oil in a pot and bring to a boil. Add in the pecans or walnuts and stir on medium heat for couple of minutes until the walnuts have absorbed the liquid or most of it. If the honey starts to burn take it of the stove and stir. Place 2 tablespoons of sugar onto a plate, pour in the walnuts and stir with two forks coating them in caster sugar. Pour over additional caster sugar. Place the walnuts onto a new plate and separate them by hand. Let cool for 30 minutes or less until you make your ice cream.

COOLING OF THE ICE CREAM - THE ICE CREAM MACHINE...10 minutes of work

Take the ice out of the freezer and now with the knife, a wooden stick just make forcefully holes in the ice to make it into a slush. It seems that it is very hard but it turns into a slush at no time. Beat all the ice in and then take the ice cream out of the fridge place the pot that it has been in in the pot with ice and stir for 5-6 minutes scraping of at the bottom and the sides of the pot.

ADDING IN THE AIR...5 minutes of work

Without removing the pot from the ice, just plug in your electric mixer and mix at hight speed for 5 minutes until the ice cream doubles in volume. 

FINALE

Add in the caramelized walnuts to the ice cream and stir. Pour the caramel topping in the bottom of the container that you wish to keep your ice cream in and cover the sides. Pour in half of the ice cream and then pour in the caramel topping that you have been holding in warm water, the jar I mean for 5 minutes so the caramel would get nice and soft. Pour over the remaining ice cream and to with the caramel. Place in the freezer.


ENJOY...NIRVANA...

понедељак, 21. март 2011.

BAKA JULKINA STARINSKA SUVA PITA S ORASIMA - ZABORAVLJENI RECEPTI


BAKA JULKINA STARINSKA SUVA PITA S ORASIMA

· 500g tankih kora za baklavu
· 500g mlevenih oraha
· 500g+ kristal šećera
· 200g suvog beleog grožđa grubo usitnjenog
· 2 vanil šećera
· cimet Kotanyi
· oko 35 kašika ulja
· prah šećer za valjanje

Priprema

Radimo sa po tri kore i pravimo 5 rolni. Položiti kore tako da je kraća strana okrenuta ka vama. Prvu koru pofajtati sa malo ulja, tj. sa oko 2 kašike, pa posuti sa 2 kašike šećera celu koru, staviti drugu koru preko, pofajtati je sa 2 kašike ulja, posuti sa 2 kašike šećera, a treću pofajtati sa 2 kašike uljem, pa posuti sa 3 i više kašika šećera, cimetom i vanil šećerom celu koru, a petinom mlevenih oraha i suvim grožđem donje dve trećine kore.

Redosled: kora (ulje, šećer) – kora (ulje, šećer) – kora (ulje, šećer, cimet, vanil šećer, a na dve trećine orasi i grožđe)

Uljem premazati oko 1cm početka kore, pa polako sa kraće strane rolovati pitu, ali voditi računa da je početak prava mala rolnica, a ne široki preklop. Ovo je jako bitno zbog preseka. Srednje-čvrsto motati rolnu i posle nekoliko krugova lepo je rukama stisnuti od jednog do drugog kraja.

Pleh od rerne obložiti papirom za pečenje, složiti pet rolni, nauljenom rukom ih premazati, pa pofajtati sa malo vode. Peći na 170–180 stepeni (bez fena) 20–30 minuta, a nakon pečenja dok je vrela pofajtati sa malo vode, pa je pokriti drugim plehom da se malo upari oko pola sata. Nemojte dugo ostaviti da voda ne kaplje na pitu previše. Pokriti pleh dobro oceđenom čistom krpom, ali gledajte da mnogo ne dodiruje pitu i ostavite tako još sat vremena. Nemojte očekivati da će pita mnogo popustiti. Ostavite je nepokrivenu da se ohladi.

Završnica

Hladnu pitu seći na parčiće oko 3,5cm, pa svako parče umakati sa svih strana bogato u prah šećer i odmah slagati u posudu. Posudu zatvoriti i ostaviti da magija počne da se dešava. Pitu čuvati van frižidera, poklopljenu u kutiji na sobnoj temperaturi.


UPUTSTVO ZA UPOTREBU

Ovo je pita kod koje je presudni faktor vreme. Što duže stoji, to je bolja. Degustirajte je tek sutradan.

Pita se hladna i isečena valja sa svih strana u prah šećer i odmah slaže u posudu sa poklopcem. Već drugog dana pita će upiti šećer, a vi je pre serviranja možete posuti prah šećerom, ali zaista nema potrebe za tim.

Pita vam može stajati koliko hoćete, ali nama nije trajala nikada duže od mesec dana.


FORGOTTEN TRADITIONAL SERBIAN WALNUT STRUDEL

This is a recipe that has been in my husband’s family for generations, prepared by his grandmother Julka. Nobody seems to mention it in cookbooks or online. It looks like baklava, but there is no liquid poured over it. It is a crispy baklava that melts in your mouth. It is a dessert eaten in small doses, savored with each bite, and it needs to sit for at least two days before trying. Like fine French cheese, it gets better as time passes. Invented out of necessity, since refrigeration was rare, it is also a dessert suitable for Lent. It can last for months, and the flavor improves with time. The best bite is the last bite. 


Ingredients

· 500g filo pastry for baklava (15 layers)
· 500g ground walnuts
· 500g+ crystal sugar
· 200g roughly chopped golden raisins
· 30g vanilla sugar
· Cinnamon powder
· Around 35 tablespoons sunflower oil
· Around 10 tablespoons water (5 + 5)
· Icing sugar for coating


Preparation

  1. You will need 15 layers of filo, using 3 pieces for each of the 5 rolls. Place the first layer with the shorter side facing you.

  2. Brush 2 tablespoons of oil over the layer, sprinkle 2 tablespoons of sugar, and place another layer on top. Repeat the process.

  3. Place the third layer, brush with 2 tablespoons of oil, sprinkle 3 or more tablespoons of sugar, add vanilla sugar and cinnamon. On the bottom two-thirds of the layer, spread one-fifth of the walnuts and one-fifth of the raisins, leaving the top part with sugar, cinnamon, and vanilla sugar only.

  4. Lightly brush about 1 cm of the top edge with oil to help the roll start neatly. Roll tightly, starting with a small initial roll. Press firmly as you roll, then press the finished roll slightly on top to flatten it. Repeat for all five rolls.


Baking

  1. Line an oven tray with baking paper and place the rolls. Brush the tops with oil and lightly sprinkle some water.

  2. Bake at 180°C for 30 minutes.

  3. Remove from the oven and cover the tray with another tray or aluminum foil for 30 minutes.

  4. Remove the tray and cover it with a well-squeezed wet linen cloth (no dripping water) and let it sit for 1 hour.

  5. Remove the cloth and let the rolls cool completely.


Finishing

  1. Cut the rolls into pieces about 3.5 cm long.

  2. Generously coat each piece in icing sugar, covering all sides.

  3. Place the pieces in a plastic container, cover, and let sit at room temperature for 24 hours before eating. Do not refrigerate.


недеља, 6. март 2011.

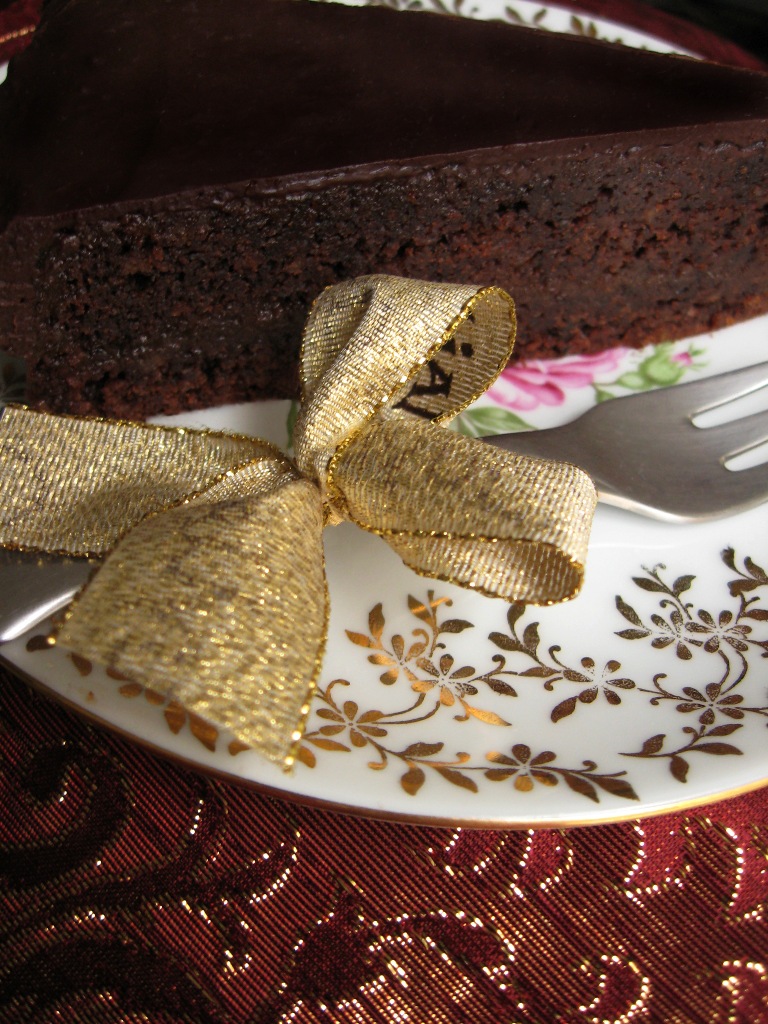
TORTA MEDENO SRCE


TORTA MEDENO SRCE


Biskvit

  • 180 g putera, sobne temperature

  • 180 g kristal šećera

  • 8 žumanaca

  • 250 g mlevenih oraha

  • 4 mlevena keksa tipa Petit Beurre (oko 30 g)

  • 3–4 pune kašičice kvalitetnog cimeta 

  • 12 g praška za pecivo

  • 2 vanil šećera

  • 180 g otopljene čokolade za kuvanje

  • Šam od 8 belanaca

  • Prstohvat soli


Sloj od džema

  • 380 g džema od kajsije

  • 5–7 kašika vode


Čokoladna glazura

  • 200 g čokolade za kuvanje

  • 70 g putera

  • 1 kašika šećera

  • 1 kašika mleka

  • 1 kašika ulja

Biskvit

U posebnoj posudi sjedinite sve suve sastojke: mlevene orahe, mleveni keks, vanil šećer, prašak za pecivo i cimet.

Rernu zagrejte na 170 °C (bez ventilatora).

Mikserom umutite puter i šećer dok ne postanu penasti. Dodajte žumanca i nastavite mućenje dok se masa potpuno ne poveže. Zatim dodajte suve sastojke i kratko mutite, pa sipajte otopljenu čokoladu i mutite dok ne dobijete jednoličnu smesu.

Belanca sa prstohvatom soli umutite u čvrst šam. Šam dodajte u smesu postepeno, po 2–3 kašike, uz mućenje na najmanjoj brzini, samo da se masa ujednači. Mešajte uvek u istom smeru, kako bi smesa ostala vazdušasta.

Dno pleha sa pomičnim dnom prečnika 25 cm obložite papirom za pečenje, a obod premažite puterom. Sipajte smesu u pleh i poravnajte.

Pecite na 170 °C oko 60 minuta. Nakon pečenja ostavite tortu da se ohladi. Skinite obruč, izvrnite tortu naopačke na tacnu i preko papira (koji ne skidate) stavite veću tacnu sa blagim opterećenjem (npr. dve litre mleka), kako bi se torta izravnala. Ostavite tako oko 60 minuta.


Sloj od džema

U manjoj šerpici zagrejte džem sa vodom dok ne provri. Skinite papir sa torte i pažljivo je prerežite horizontalno na dva jednaka dela. Polovinu džema premažite preko donje polovine, zatim tortu ponovo spojite, a ostatkom džema premažite celu tortu.

Obratite pažnju da uklonite eventualne komadiće voća iz džema, jer mogu smetati glazuri. Tortu sa tacnom stavite u zamrzivač na 15 minuta.


Glazura

Na pari otopite čokoladu, šećer, puter, mleko i ulje, mešajući dok ne dobijete glatku i sjajnu glazuru. Širokim nožem, brzim i sigurnim potezima, prelijte glazuru preko ohlađene torte.

Ako vam ostane malo čokolade, sipajte je u čvrstu kesicu, sačekajte da se malo prohladi ali da ostane tečna, pa odsecite vrh i ispišite dekoraciju (npr. Sacher ili neko ime) po torti.


SACHER TORTE

Ingredients

Cake

  • 180 g butter, room temperature

  • 180 g sugar

  • 8 egg yolks

  • 250 g ground walnuts

  • 4 ground Petit Beurre biscuits or 30 g butter cookies

  • 3–4 full teaspoons ground cinnamon

  • 12 g baking powder

  • 1 tablespoon vanilla sugar

  • 180 g dark unsweetened cooking chocolate, melted

  • 8 egg whites

  • A pinch of salt

Apricot Layer

  • 380 g apricot jam

  • 7 tablespoons water

Chocolate Glaze

  • 200 g dark unsweetened cooking chocolate

  • 70 g butter

  • 1 tablespoon sugar

  • 1 tablespoon milk

  • 1 tablespoon oil


Combine all dry ingredients in a bowl: ground walnuts, ground biscuits, vanilla sugar, baking powder, and cinnamon.

Preheat the oven to 170°C (no fan).

Using an electric mixer, beat the butter and sugar for about 1 minute, until creamy. Add the egg yolks and continue mixing for another 2–3 minutes, until fully incorporated.

Add the dry ingredients and mix briefly. Pour in the melted chocolate and mix until the batter is smooth and evenly colored.

Whip the egg whites with a pinch of salt until stiff peaks form. Gently fold the egg whites into the chocolate mixture, a few tablespoons at a time, mixing on the lowest speed or by hand, always in the same direction, just until combined.

Line the bottom of a 25 cm round springform pan with baking paper and butter the sides. Pour the batter into the pan and level the surface.

Bake for 60 minutes, then remove from the oven and allow to cool.

Release the sides of the pan, invert the cake onto a tray, and remove the pan bottom, leaving the baking paper on top. Place another tray over the cake and add a light weight to gently level it. Let cool completely.


Apricot Layer

Heat the apricot jam and water in a small saucepan until it comes to a boil. Remove from heat.

Remove the baking paper from the cake and slice it horizontally into two equal layers. Spread half of the jam over the bottom layer. Place the top layer back on and pour the remaining jam over the entire cake, spreading evenly.

Place the cake (on its tray) in the freezer for 15 minutes.


Chocolate Glaze

Melt the chocolate, butter, sugar, milk, and oil in a double boiler until smooth and glossy. Pour the chocolate over the chilled cake and, using a wide knife or spatula, quickly spread it evenly over the top and sides.